 Use menu View | Advanced for creating photos, videos, and panoramas of your project.
For the presentation of your project, you could use the animation. Select viewpoints you would like to use. If you used the navigation panel to save custom viewpoints, these will appear for use as well. Best to start in the middle of the room, to avoid hidden walls. Use the arrows up and down to change the order. Use speed to slow or speed up de change of viewpoints. Start the animation with the play button. If Repeat is activated, the animation starts automatically again after the last viewpoint. Use F11 to open/exit full view screen.
The animation can be saved to a video. Use the button save video to publish on ViSoft360, hard disc or YouTube.
Use the Fly Around button to start an animation around the space. Use the lower taskbar to activate Auto-hide walls and right-click to auto-hide connected sanitary or murals as well.
With Visualization effects adjust reflections, shadows and the global illumination. Lower the settings or disable the visualization effect if your graphic card is giving trouble. The same goes for 3D Settings (use context menu to disenable).
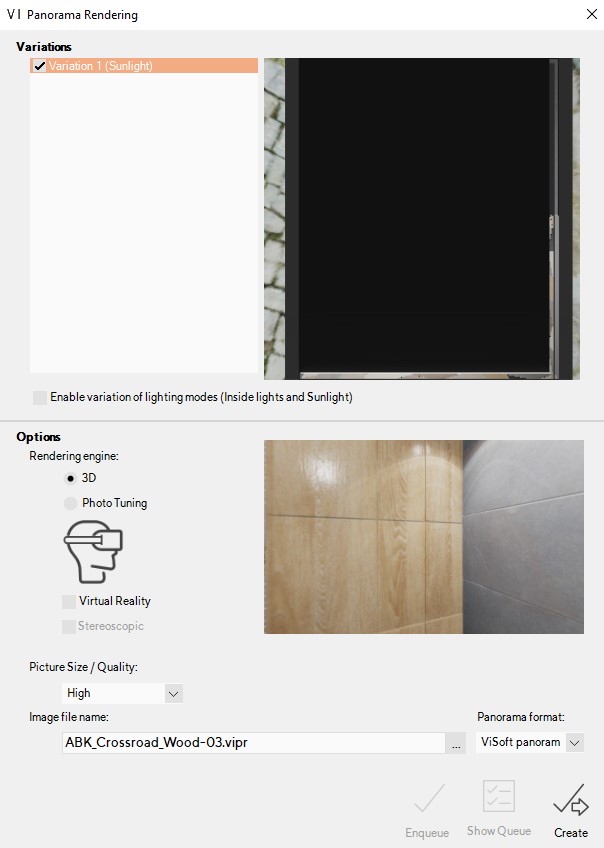
Use the button Save picture to save a JPG or BMP file of your current view. You can save a panorama to create a 360 image of the room. Set the viewpoint in the middle of the room, then press save. The window Panorama rendering opens.

Phototuning is an extra module, to render lifelike images. The Media Browser shows all the created images and gives fast access to ViSoft360. You can choose which rendering engine to use: 3D, phototuning and virtual reality. Select a folder to save the panorama. Create make to render a panorama.
In this article you can read step by step how to upload media to your ViSoft360 account to share it with your customers.