There are four different plan groups available: level, room information, room plans and tiling plans. You can find them in the Explorer on the left edge of the screen.
Level shows the ground plan of the project with measures of walls and apertures. Click button Drawing layers to customize the appearance of your plans.

Dimension – manually draw the distance between two points. Activate this button then click into the working surface to define the position of the first point. Move mouse to the second point and click again. Use Dimension properties to enter the text that appears on the dimension and to shift the dimension line. Define the dimension style in Draw mode. Switch on / off the extension lines.
Chain dimension – manually draw vertical, horizontal or diagonal chain dimensions. Right click to end or cancel the dimension.
Tile size – click on this button and then on a tile on the plan. Size of the tile you clicked is shown in mm.
Label – write a text in a frame anywhere on the printout. Activate this button then create a frame in working surface. Click into the frame to enter the text. Choose font, size, color and background color in Text label properties. Labels can be saved to and selected from library.
Line – draw lines manually anywhere on the plan. Lines can start or end with an arrow. Different sizes and colors can be applied.
Grout Info – click on the plan after enabling this button will show a description of the grout used in that region.
Picture – add picture to the plan. It can be moved or resized after placing.
Library – open library of symbols. After placing a symbol you can resize it.
Create elevation page – add page with custom elevation settings.
Dimension properties – define font of and form of a dimension line.
Current page – select one of the plans.
Print settings – scale, logotypes, footnotes and printer setup options.
Preview and print – creates print preview from which you can choose to print the part list; right click to print all part lists at once.
Auto dimensioning – turn on / off automatic dimensions.
Drawing style – set wall fillings, mural and region shadings.
Save to PDF – create a PDF file containing selected plans.
You can hide any object on the plan by right clicking it and selecting Hide object.
In the Room information you can see the base area in square meters, outline and volume of the room, total area of walls and floor…
In the group Plans you will see measures of murals and sanitary ware. Tiles and sanitary ware can be presented in real color.
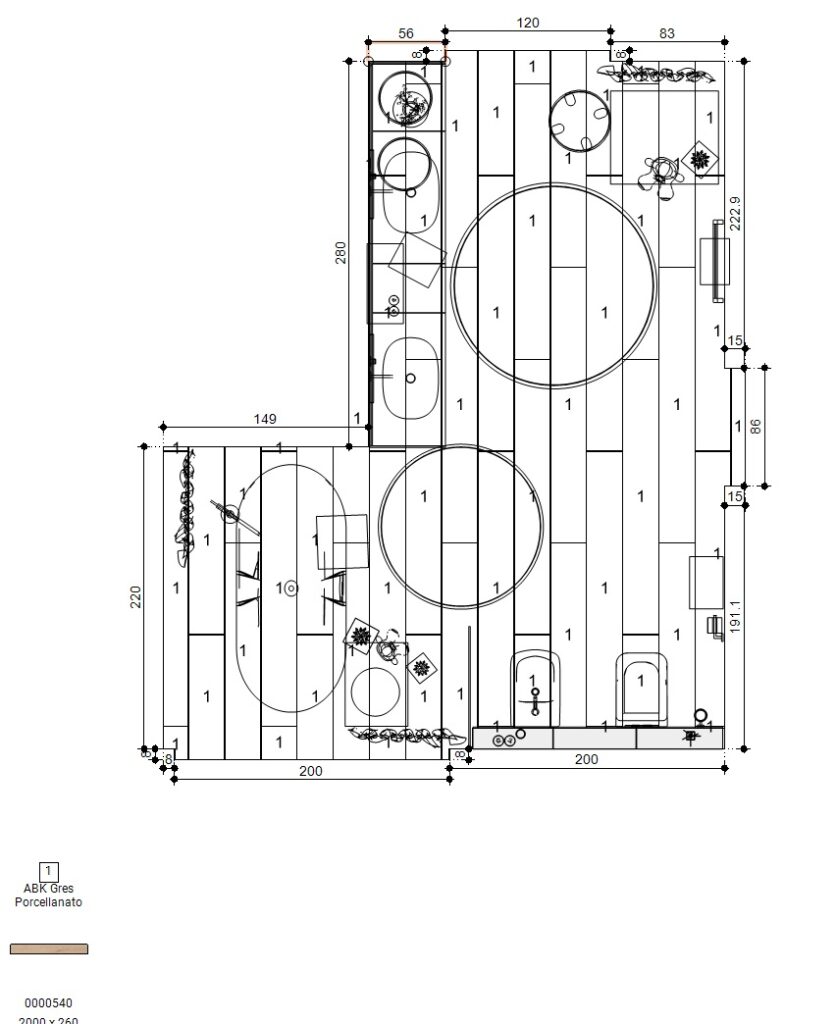
Last group are the Tiling plans. Measured are walls and regions (except free regions). Tiles and sanitary ware can be presented in real color. Otherwise tiles are marked with numbers so they can be identified.